Written by Jared Miera, Colorado Master Gardener, 2013
This time of year finds me looking through my back window past the snow-covered ground, imaging the vegetables growing in all their splendor. They look spectacular and are drawing me towards their presence. Leaning towards the window, I quickly feel the cold air and remember that there is still time before the growing season’s height.
Daydreaming will have to wait. There is work that must be done now – work that can be challenging, frustrating, and potentially fruitless.
Failing to complete this work would leave the garden fruitless anyway, so I better get to work.
Many individuals and gardeners set out with ambitious plans to grow their produce from seed to harvest. Although this cycle has been completed throughout most of history, it is not always an easy undertaking. Some efforts have been wasted, other attempts inexplicably fail and some bring great success.
There is incredible satisfaction in seeing seeds sprout and having the opportunity to nurture them until transplant. This alone makes it worth going through the effort in starting seeds indoors.
Access to the internet creates an overload of information to differentiate amongst all the modern hacks to successful seed starting. The colder winter months bring additional screen time and an itch to get things ready for the germination process. However, this process can be simplified. Simplicity can be a beneficial strategy in the event of things going sideways.
The greatest success in germination that I have experienced has been a result of keeping things simple. What makes starting seeds indoors simple?
First, resist the urge to start everything that will be found in your garden. Many vegetables are best suited for direct sowing. Focus on tender summer crops, specifically those in the nightshade family, tomatoes, peppers, and eggplant. The purpose of starting seeds indoors is to get a few extra days in the life cycles of those 160- and 180-day maturity varieties.
Second, get an early start on this process. Timing is important to making this a worthwhile endeavor. If time is spent waiting, then the best plan may be to purchase starters from the nursery.
Once you have selected the seeds you wish to grow, determine what type of medium you plan to use. Prepare a space for your seeds’ growth; an ideal area will have minimal temperature swings, clean, easy to access, and able to house a plant for 6-8 weeks.
Let’s make starting seeds an easy process.
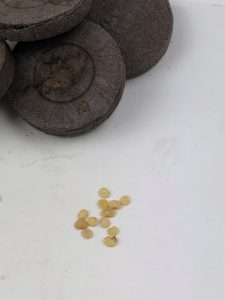
Required materials are not limited to but include localized seeds or something new to try. Jiffy Pellets, seed tray, seed tray grow dome, seed mat, and patience.
Ideal temperatures range between 60-80 degrees Fahrenheit, below or above this range is less than ideal and may result in poor growth or no growth.
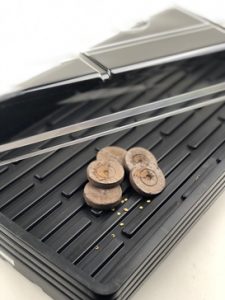
- Soak the pellets in hot water. This will allow them to swell and expand. It also adds some heat to the enclosed tray allowing for condensation and temperature ranges to be achieved quicker.
- Place 2-4 seeds in each pellet.
- Place pellets in a seed tray and cover with the grow dome.
- Place in a dark area that has stable temperatures. Note, covering the tray with a black trash bag can be helpful.
- Let the seeds work their magic and check back on them in 7-10 days.
- Once you see some sprouted seeds, you can prepare for the next phase in this process – introducing light and nurturing them.
These easy-to-follow steps can make the seed starting process a little more enjoyable, with reduced stress from doing too much.
Photos below by Jared Miera, (c) 2021